06:00
Shiny Design
Day 25
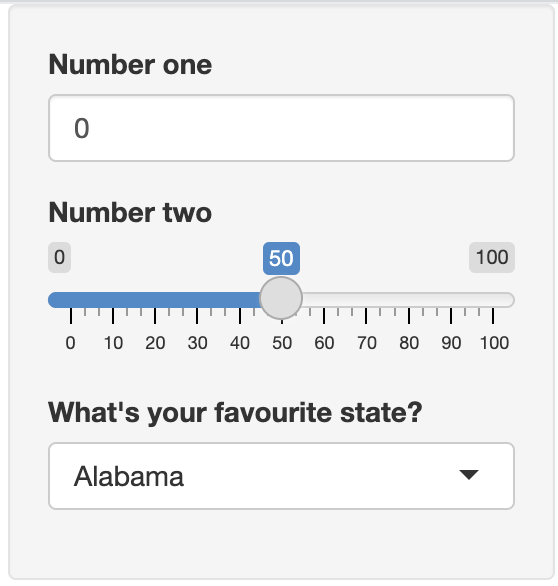
Shiny inputs
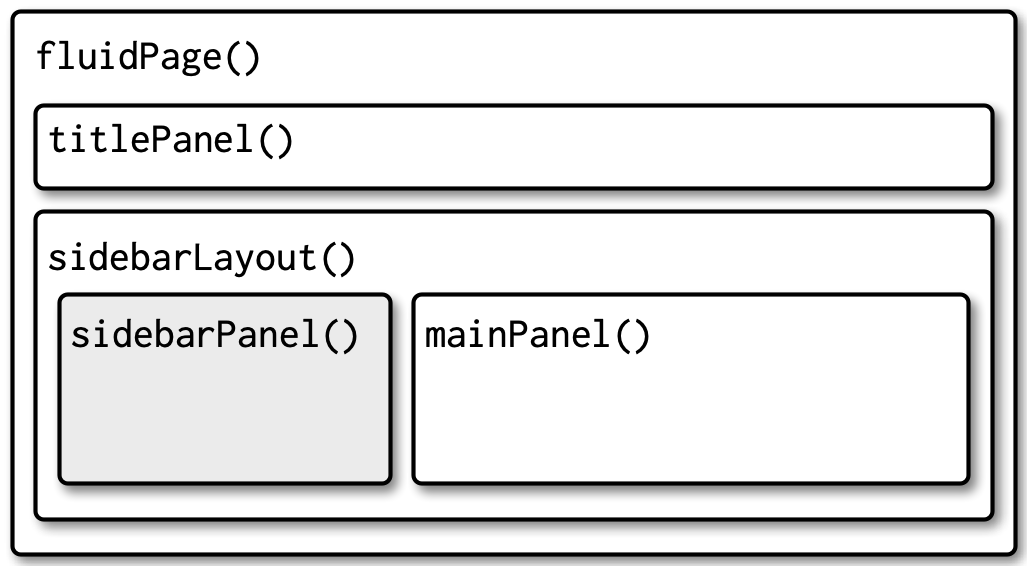
Page with sidebar
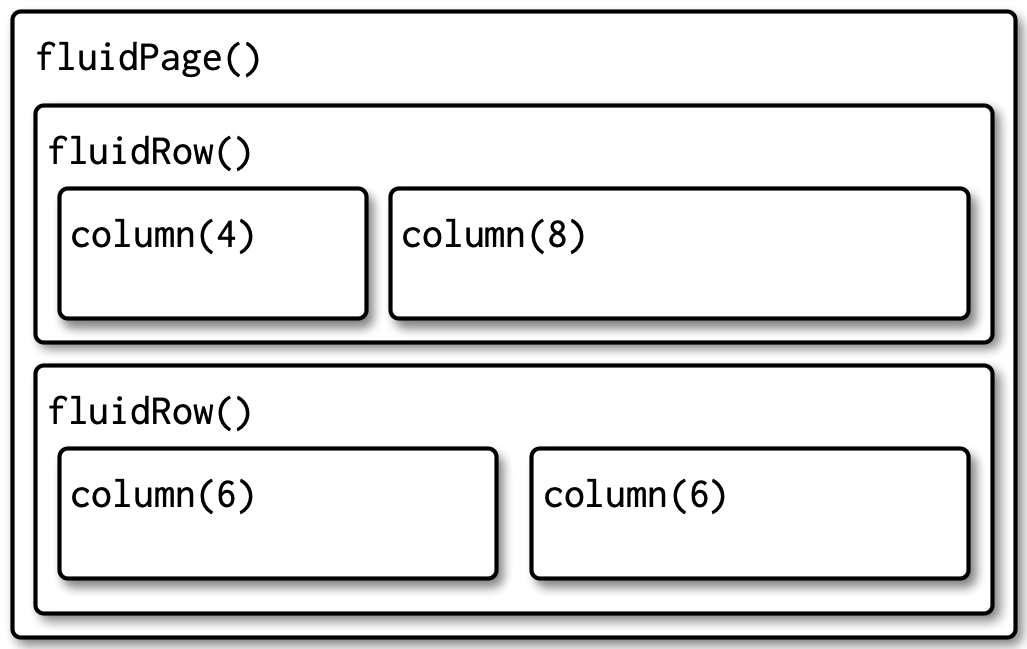
Multi-row
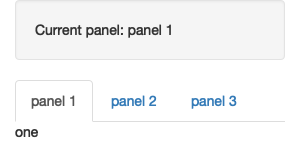
Multi-page: Tabsets
ui <- fluidPage(
  sidebarLayout(
    sidebarPanel(
      textOutput("panel")
    ),
    mainPanel(
      tabsetPanel(
        id = "tabset",
        tabPanel("panel 1", "one"),
        tabPanel("panel 2", "two"),
        tabPanel("panel 3", "three")
      )
    )
  )
)
server <- function(input, output, session) {
  output$panel <- renderText({
    paste("Current panel: ", input$tabset)
  })
}
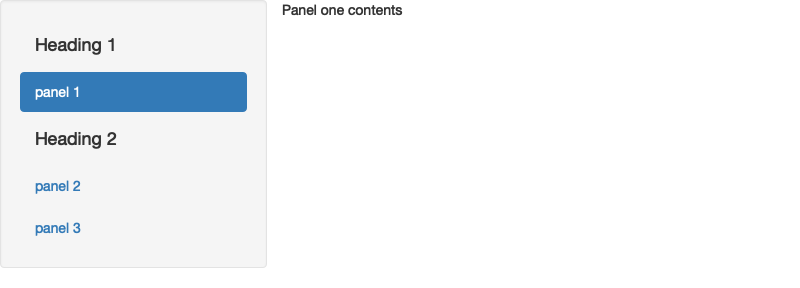
Multi-page: nav list
Multi-page: nav bar

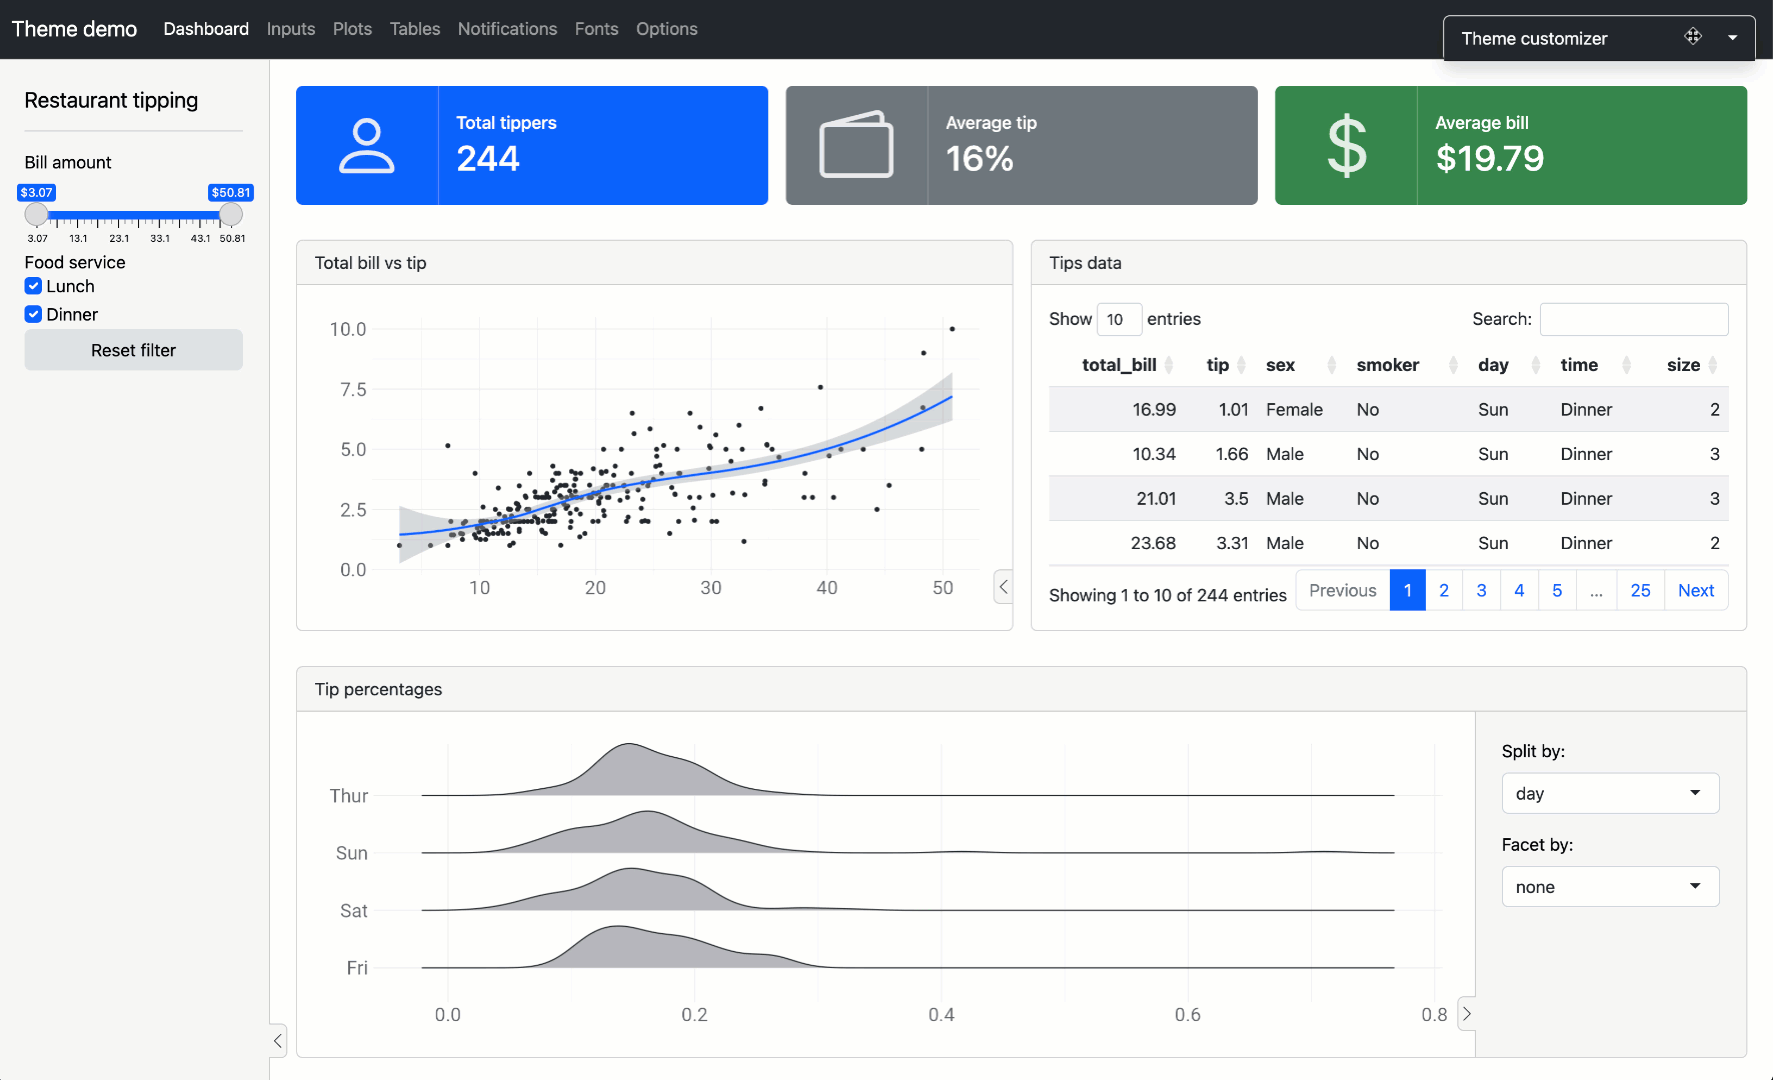
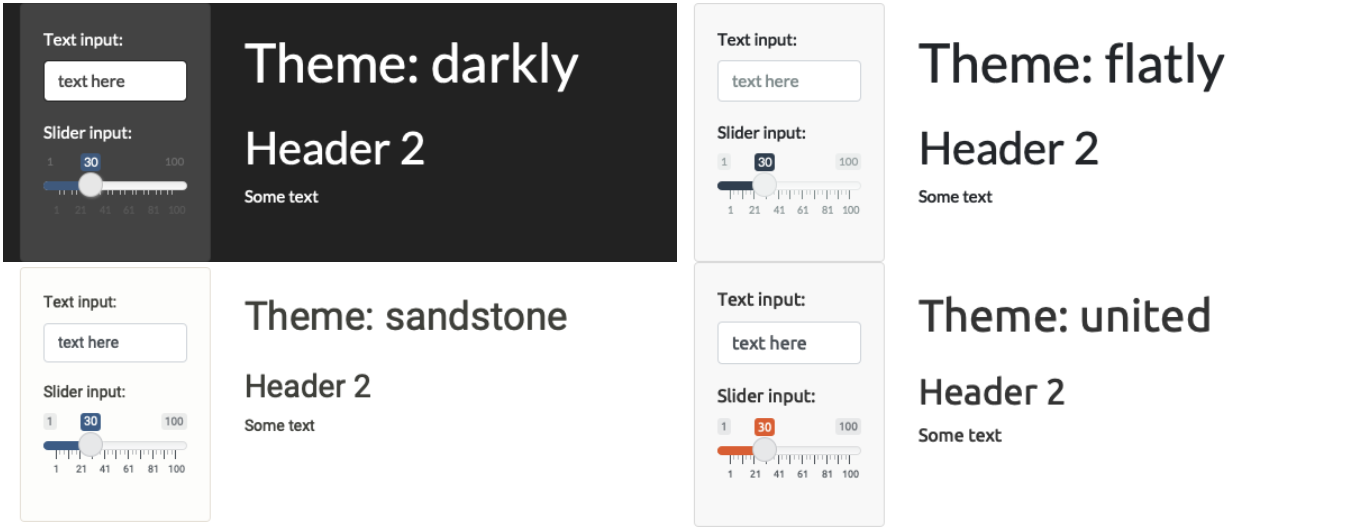
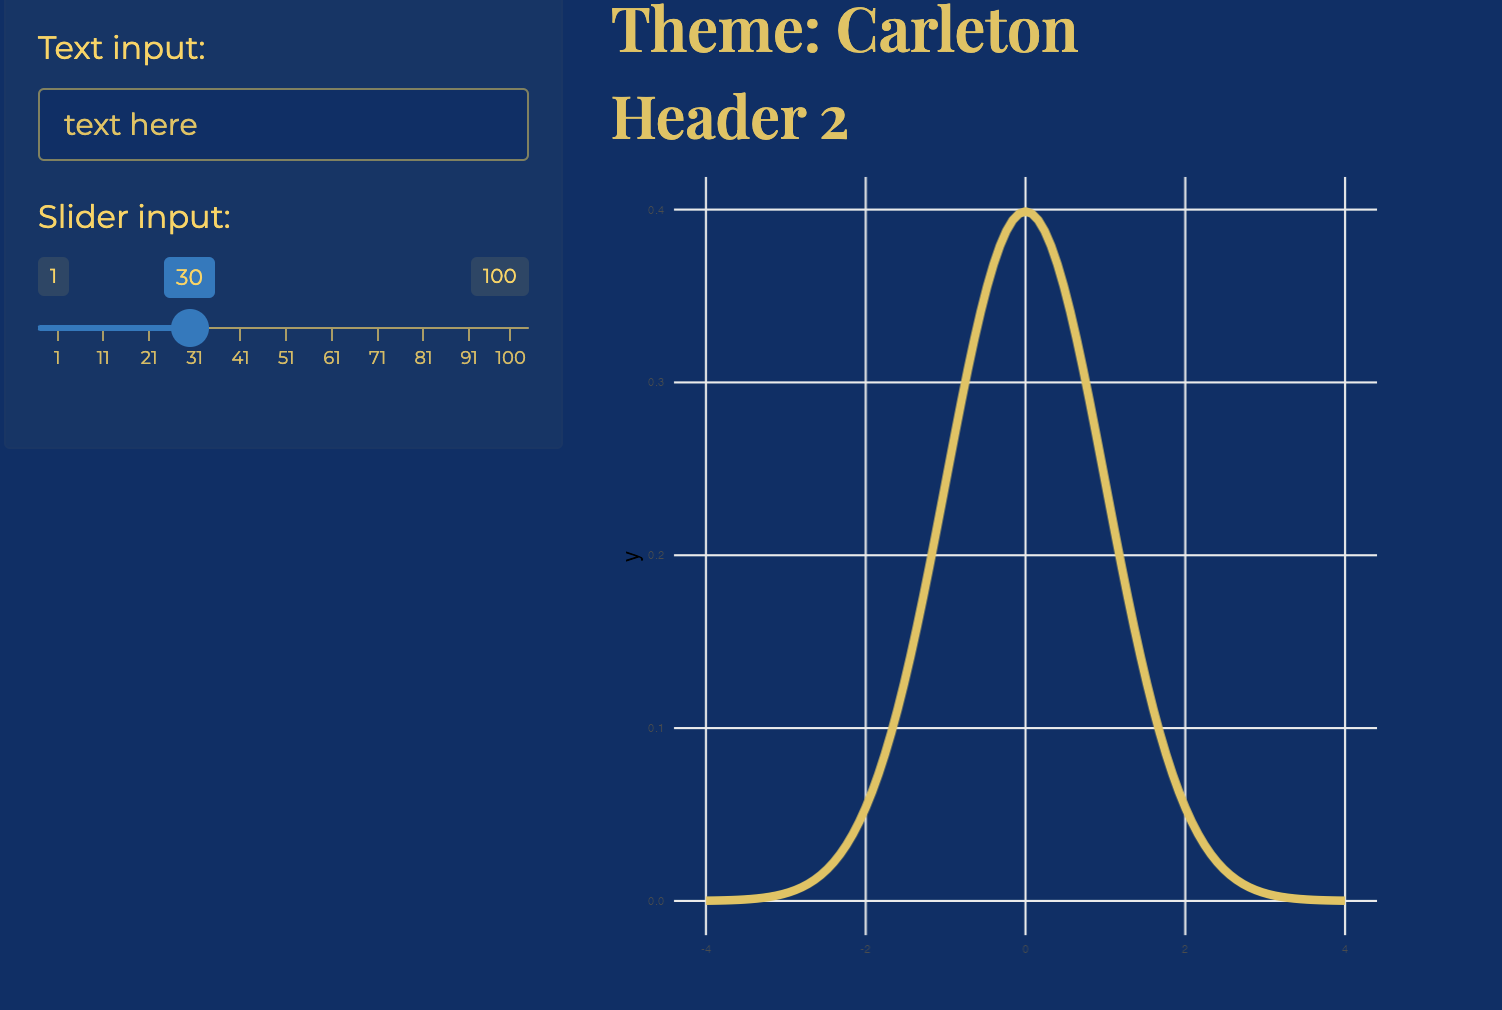
Theming: built-in themes
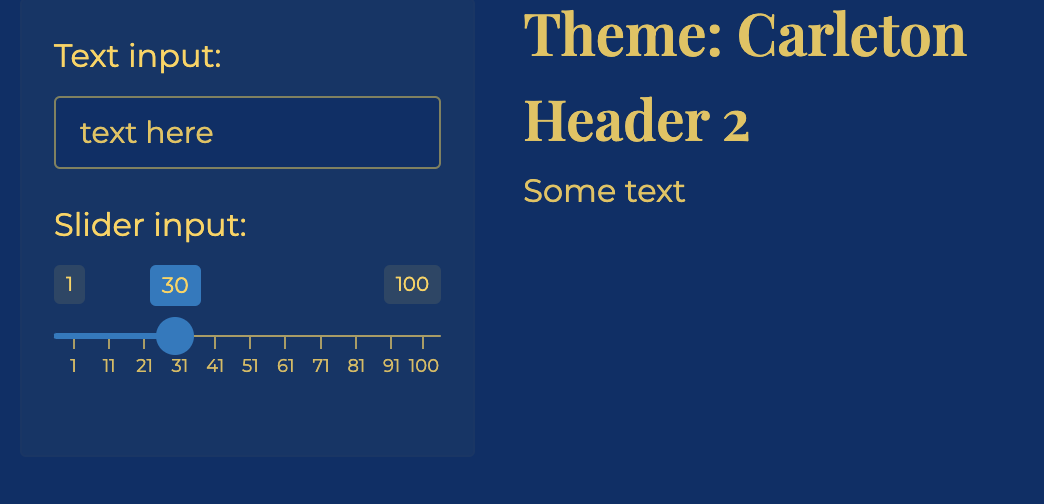
Theming: customize
Plot theming
Add theme = bslib::bs_theme() to your ui() function, and bslib::bs_themer() to your server function to try out different options interactively